
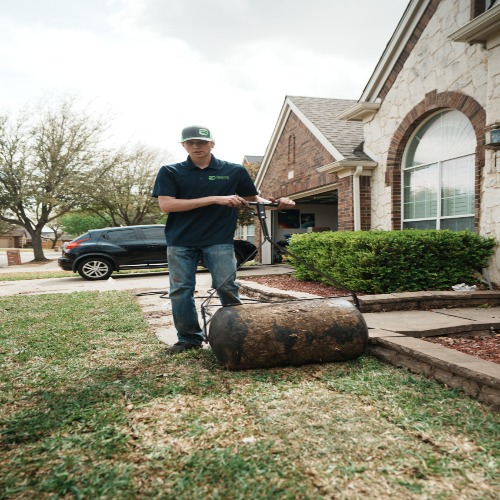
Let’s be honest nothing drags down your home’s curb appeal faster than a cracked, uneven sidewalk. If you’re tired of looking at concrete that has seen better days, paver sidewalk installation is one of the smartest upgrades you can make. It’s flexible, beautiful, and far easier to repair than a monolithic concrete slab.
I’ve installed plenty of paver walkways over the years, and I’m going to share the exact steps, tools, and tricks that make the difference between a path that lasts 30 years and one that sinks after the first heavy rain.A lasting paver sidewalk needs a 7–9 inch excavated area, 4–6 inches of compacted gravel, 1 inch of leveling sand, tightly fitted pavers, edge restraints, and polymeric sand in the joints.
Why Choose Pavers for Your Sidewalk?
Here’s the thing about concrete sidewalks: when they crack, you’re stuck with ugly patches or a full replacement. Pavers, on the other hand, work like a flexible puzzle. If one piece gets damaged, you lift it out and replace it. No jackhammer required.
Paver sidewalks also offer:
-
Better drainage – permeable pavers let water seep between joints, reducing puddles and ice patches.
-
Design freedom – choose colors, shapes, and patterns to match your home.
-
Freeze-thaw resistance – the individual pieces move slightly with the ground, so they don’t crack like rigid concrete.
-
Higher perceived value – a paver walkway adds a custom, high-end feel to your front entrance.
If you’re in a state with harsh winters, this is a game-changer. Your sidewalk can flex with the freeze-thaw cycle instead of fighting it.
Tools & Materials You’ll Need
Before you dig, gather everything. Trust me, running to the hardware store mid-project kills momentum.
Materials:
-
Pavers (calculate area and add 5–10% for cuts)
-
Paver base (crushed stone, ¾-inch minus)
-
Concrete sand or leveling sand
-
Polymeric sand for joints
-
Edge restraints (plastic, aluminum, or concrete)
-
Landscape fabric (optional for clay soil)
-
10-inch spikes for edge restraints
Tools:
-
Shovel, wheelbarrow, rake
-
Plate compactor (rent one for about $60–$90/day)
-
Level, string line, tape measure
-
Rubber mallet
-
Masonry saw or angle grinder with diamond blade
-
Safety glasses, gloves, knee pads
Step-by-Step Paver Sidewalk Installation Guide
Step 1: Plan and Measure Your Walkway
Use a garden hose or spray paint to mark the edges of your path. A straight sidewalk is easier, but a gentle curve adds charm. Standard walkways are 36 to 48 inches wide wide enough for two people to walk side by side.
Measure the total square footage. Multiply length by width. Add 5–10% extra for cuts and waste. For example, a 50-foot by 3-foot sidewalk is 150 square feet, so order around 160–165 square feet of pavers.
Pro tip: Call 811 before you dig. It’s free and prevents you from hitting buried utility lines.
Step 2: Dig and Prepare the Base
Excavate the marked area to a depth of 7–9 inches. For a typical paver that’s 2 ⅜ inches thick, you need:
-
4–6 inches of gravel base
-
1 inch of sand
-
Paver thickness
If you have heavy clay soil or poor drainage, go deeper and add landscape fabric under the gravel. This keeps the base from mixing with the soil and prevents weeds.
Step 3: Add Gravel and Compact
Spread 4–6 inches of crushed stone in 2-inch lifts. After each lift, run a plate compactor over it. This base is the backbone of your paver sidewalk installation. Skip this step, and you’ll have sinking pavers within a year.
The base should feel rock-solid when you walk on it. If it shifts under your feet, compact it more.
Step 4: Screed the Sand Bed
Lay down 1 inch of concrete sand. Use two 1-inch PVC pipes as guides and drag a straight 2×4 across them to create a perfectly flat surface.
Do not compact the sand. You want it loose enough for the pavers to settle slightly, but level enough to prevent dips.
Step 5: Lay the Pavers
Start from a straight edge or a corner. Place each paver directly onto the sand, tight against its neighbors. Follow your chosen pattern running bond, herringbone, or basket weave.
Use a rubber mallet to gently tap high spots into place. Check the level every few feet. A small, 2-foot level works for individual pavers, but a 4-foot level helps you see the bigger picture.
Step 6: Cut Edges and Install Edge Restraints
At the edges, you’ll need to cut pavers to fit. Use a masonry saw or an angle grinder with a diamond blade. Wear safety glasses and a dust mask.
Once all pavers Sidewalk Installation are in place, install edge restraints along the perimeter. These plastic or metal strips keep the pavers from shifting outward over time. Secure them with 10-inch spikes driven through the pre-drilled holes.
Step 7: Compact and Fill Joints
Sweep polymeric sand into the joints between pavers. Use a push broom to work it deep into every gap.
Now run the plate compactor over the entire surface. Use a protective rubber mat or a piece of carpet to avoid chipping the pavers. The vibration settles everything and locks the pavers into the sand.
Sweep more polymeric sand into any joints that opened up. Then lightly mist the surface with water to activate the polymer. Let it dry for at least 24 hours before walking on it.
Expert Tips for a Long-Lasting Paver Sidewalk
These are the details that separate a weekend DIY job from a professional-looking installation:
-
Slope away from your house. Your sidewalk should drop about ¼ inch per foot so water runs off, not toward your foundation.
-
Use polymeric sand, not regular sand. Regular sand washes out and invites weeds. Polymeric sand hardens when wet, locking pavers together.
-
Don’t skimp on the base. More gravel means better support. If you’re in a freeze-thaw area, aim for 6 inches of compacted base.
-
Install edge restraints even if you think you don’t need them. They are cheap insurance against shifting.
-
Choose permeable pavers if drainage is a concern. They allow water to pass through, reducing runoff and ice buildup.
Common Paver Sidewalk Installation Mistakes to Avoid
Avoid these pitfalls, and your sidewalk will thank you:
-
Skipping the base or making it too thin. This is the number one cause of sunken, uneven pavers.
-
Forgetting to slope for drainage. Water will pool and freeze, pushing pavers out of place.
-
Using the wrong sand. Play sand or masonry sand is too fine and won’t drain properly. Use concrete sand or leveling sand.
-
Laying pavers on uncompacted ground. Always compact the soil and the gravel base.
-
Ignoring local codes. Some municipalities require permits for front walkways or have rules about right-of-way work. Check before you start.
Maintenance & Care for Paver Sidewalks
Paver sidewalks are low-maintenance, but not zero-maintenance. Here’s how to keep yours looking fresh:
-
Sweep regularly to remove debris that can stain or clog joints.
-
Pull weeds early or use a weed preventer between joints.
-
Reapply polymeric sand every 2–3 years as joints settle.
-
Seal pavers every 3–5 years to protect color and make cleaning easier.
-
Fix sunken spots by lifting the affected pavers, adding sand, and re-leveling.
A little care goes a long way. Ten minutes of sweeping a month beats a full reset later.
Cost of Paver Sidewalk Installation in the USA
Wondering what this will set you back? Here’s a realistic breakdown:
-
DIY installation: $4–$8 per square foot for materials.
-
Professional installation: $12–$25 per square foot, including labor.
For a 150-square-foot walkway, that’s roughly $600–$1,200 if you do it yourself, or $1,800–$3,750 if you hire a pro. The biggest cost variable is the type of paver—basic concrete pavers are cheaper, while natural stone or permeable pavers cost more.
If you’re comfortable with a shovel and a level, this is a very achievable weekend project.
Final Thoughts:
A paver sidewalk is more than just a path it’s an invitation to your front door. It boosts curb appeal, handles freeze-thaw cycles better than concrete, and gives you a custom look that reflects your style.
The steps aren’t complicated. Dig deep enough, compact the base, use edge restraints, and fill those joints with polymeric sand. Do that, and your paver sidewalk installation will be the envy of the neighborhood for decades.
Ready to get started? Grab a shovel, call 811, and turn that tired walkway into a stunning entrance. Your future self will thank you every time you walk up to your front door.