
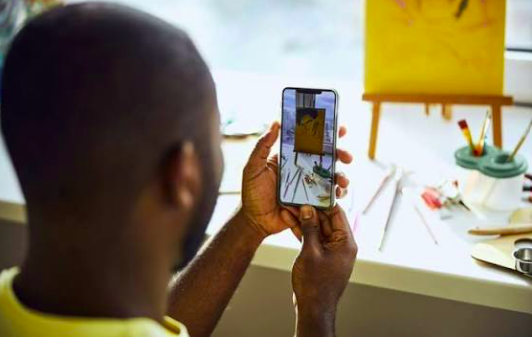
At some point, most collectors need a decent photograph of a painting they own — for insurance documentation, to sell or consign a piece, to share with a framer or conservator, or simply to keep a proper record of their collection. It’s a task that seems simple until you actually try it and realize how easily color, glare, and distortion can make even a great painting look flat or inaccurate in a photo. Here’s how to do it properly.
Why It’s Worth Getting Right
A poor photograph doesn’t just look unflattering — it can genuinely misrepresent a piece. Inaccurate color, visible glare obscuring detail, or distorted proportions from an awkward angle can all create a misleading record, which matters more than people expect if that photo is ever used for insurance purposes, a sale, or simply your own long-term documentation. Getting the basics right takes only a little extra effort and makes a real difference.
Lighting: The Single Biggest Factor
Lighting affects a painting photograph more than any other variable, and it’s usually the reason amateur photos of art look noticeably worse than professional ones.
Avoid direct flash. A camera or phone flash almost always creates harsh glare, especially on varnished or glossy surfaces, and it flattens the natural depth and texture of the paint. Turn flash off entirely.
Use even, diffused natural light when possible. Overcast daylight near a window, or a shaded outdoor spot, tends to give the most accurate, even lighting. Avoid direct, harsh sunlight, which creates strong shadows and can wash out colors unevenly.
If using artificial light, position it carefully to avoid glare. Two light sources, positioned at roughly 45-degree angles on either side of the painting rather than pointed straight at it, generally reduces glare and gives more even coverage than a single direct light source.
Photograph at the same time of day if you’re documenting multiple pieces over time. Consistency in lighting conditions makes it easier to compare photographs accurately if you’re tracking a collection’s condition over months or years.
Angle and Positioning
Shoot straight-on, not at an angle. Even a slight angle introduces distortion, making a rectangular painting look subtly trapezoidal in the photo. Position your camera directly in front of the center of the painting, at the same height as the painting’s center, rather than shooting from above or below.
Fill the frame appropriately. Get close enough that the painting takes up most of the frame, but leave a small margin around the edges rather than cropping right up to the border, which helps confirm the full piece, including edges, is accurately represented.
Remove the painting from its frame if possible for the most accurate documentation, particularly for insurance purposes, since frame glare and reflections can obscure detail. If removing it isn’t practical, angle your shot carefully to minimize reflections in the glass.
Use a tripod or stable surface if you have one. Even slight camera shake can soften detail, particularly in lower light conditions. A steady shot makes a noticeable difference in the final image quality.
Capturing Accurate Color
Color accuracy is one of the hardest things to get right in art photography, and it’s worth taking a bit of extra care here specifically.
Use a consistent light source, ideally daylight-balanced. Mixing different light types — daylight through a window plus an indoor bulb, for instance — can create odd color casts that are hard to correct later.
Check your camera or phone’s white balance setting. Many phones auto-adjust white balance in ways that can slightly shift color. If your camera allows manual white balance adjustment, setting it based on the actual lighting conditions helps.
Include a color reference if the documentation is important enough to warrant it. For insurance or sale purposes on a significant piece, photographing alongside a simple neutral gray card can help establish a true color baseline, which is useful if the photo is ever compared against the physical piece later.
Compare the photo to the actual painting immediately after shooting. Look at both side by side and adjust your lighting or settings if the colors read noticeably differently, rather than assuming the photo is accurate without checking.
Capturing Texture and Detail
For paintings with visible brushwork or raised paint, a single overall shot often doesn’t fully convey the texture. It’s worth taking a few additional close-up shots of specific areas with notable texture or fine detail, angled slightly to let raised paint catch a bit of shadow and show its dimensionality. This is particularly useful for insurance documentation, since it helps establish the painting’s actual physical condition, not just its visual appearance.
Documenting the Whole Piece, Not Just the Front
For thorough documentation, particularly for insurance or resale purposes, it’s worth photographing more than just the front of the painting:
- The back of the canvas or panel, which can include artist signatures, gallery labels, or other provenance information.
- Any signature or inscription, photographed close enough to be clearly legible.
- The frame itself, if it’s original or has its own significance.
- Any visible condition issues, such as cracking or discoloration, documented clearly as a baseline record.
This full documentation becomes especially valuable over time, since it gives you (or an insurer, or a future buyer) a clear reference point for the piece’s condition and authenticity markers.
Organizing Your Photos
Once you’ve taken good photographs, it’s worth organizing them in a way that’s actually useful later — labeled with the artist, title (if known), date acquired, medium, dimensions, and any relevant notes. A simple, consistent naming and filing system saves considerable time if you ever need to locate documentation quickly, whether for an insurance claim or a sale inquiry.
Good documentation also matters if you’re ever verifying a piece’s authenticity or discussing it with a gallery. Ejaz Art Gallery has written a useful guide on spotting fake oil paintings, and having clear, accurate photographs of your own collection — including close-up shots of brushwork and signatures — supports exactly this kind of verification process if it’s ever needed.
A Habit Worth Building
Photographing your collection properly isn’t a one-time task so much as an ongoing habit worth building as your collection grows or changes. Taking the time to do it well, even just for a handful of significant pieces, pays off considerably more than people expect the first time you actually need those photos for something important.
If you’re building a collection in Lahore and want guidance on documentation, condition, or authentication for a specific piece, ejazartgallery.com can offer direct advice.
Frequently Asked Questions
1. Should I use my phone camera or a proper camera to photograph my paintings? A modern phone camera is generally sufficient for most documentation purposes, as long as you pay attention to lighting, angle, and avoiding flash. A dedicated camera offers more control but isn’t strictly necessary for good results.
2. Why does my photo of a painting look different in color from the real thing? This is usually caused by inconsistent lighting, incorrect white balance settings, or mixed light sources. Using even, daylight-balanced lighting and checking your camera’s white balance settings helps significantly.
3. Do I need to photograph the back of a painting, not just the front? For thorough documentation, particularly for insurance or resale purposes, yes. The back can include signatures, labels, or other information relevant to provenance and authenticity.
4. Should I remove a painting from its frame before photographing it? If practical, yes, particularly for important documentation, since glass and frame elements can create glare or obscure detail. If removal isn’t practical, angle your shot to minimize reflections.
5. How often should I update photographs of my collection? It’s worth updating documentation periodically, especially if you notice any changes in a piece’s condition, or whenever you acquire something significant enough to warrant proper insurance or provenance records.