
If you own a flat or low-slope roof, you have probably heard the term EPDM. It is that black rubber membrane that has been keeping American homes, RVs, and commercial buildings dry for decades. But after years of brutal sun, rain, snow, and temperature swings, even the toughest EPDM can start to crack, fade, and leak.
Here is the good news: you do not have to replace the whole roof. In most cases, you can restore your EPDM roof yourself. And I am going to walk you through exactly how to do it, step by step.
Yes, you can restore an EPDM roof. The process involves cleaning the membrane, repairing seams and flashing, applying EPDM primer, and rolling on a liquid EPDM or acrylic coating. Done correctly, a restoration can add 10 to 15 years of life to your roof.
What Is an EPDM Roof?
EPDM stands for ethylene propylene diene monomer. That is a fancy way of saying synthetic rubber. It is one of the most popular roofing materials for flat and low-slope roofs because it is flexible, durable, and resistant to UV rays and ozone. You will find it on commercial buildings, residential additions, and plenty of RVs.
Unlike shingles, EPDM comes in large sheets. Those sheets are joined at the seams. Over time, the seams can open, the surface can oxidize, and small punctures can appear. That is when an EPDM roof restoration becomes necessary.
Why Restore Instead of Replace?
Let us be honest: replacing an EPDM roof is expensive. Depending on your location, a full tear-off and replacement can run anywhere from $6,000 to $15,000 or more. Restoration, on the other hand, usually costs a fraction of that often under $2,000 for a residential roof.
But it is not just about money. Restoration keeps thousands of pounds of old roofing out of landfills. It also causes less disruption to your home or business. If the membrane is still mostly intact and the insulation below is dry, rubber roof repair and restoration is the smart, eco-friendly choice.
Tools and Materials You Need
Before you climb that ladder, gather everything. Here is a simple checklist:
-
Push broom or leaf blower
-
Garden hose or low-pressure power washer
-
EPDM cleaner or mild detergent
-
Scrub brush
-
Clean rags
-
EPDM primer
-
Lap sealant or butyl tape
-
EPDM repair tape or patch kit
-
Liquid EPDM or acrylic roof coating
-
Paint roller or squeegee
-
Caulk gun
-
Safety gloves and non-slip shoes
Do not skip the safety gear. Wet EPDM is slippery, and you do not want a trip to the ER to ruin your DIY weekend.
Step-by-Step Guide to Restore Your EPDM Roof
Step 1: Inspect for Damage
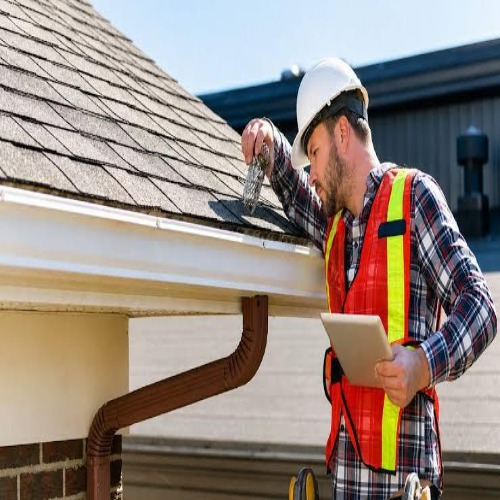
Start by walking the roof slowly. Look for cracks, punctures, open seams, bubbles, and areas where the membrane is pulling away from flashing or edges. Mark every problem spot with chalk or tape.
Pay close attention to seams and penetrations those are where most leaks start. If you find large soft spots or wet insulation, stop and call a professional. Coating over rotten decking is a recipe for disaster.
Step 2: Clean the Roof Surface
This is the step most people rush, and it is a huge mistake. EPDM coatings will not bond to dirt, chalk, or old oxidation. Sweep off all loose debris with a push broom or leaf blower.
Then, mix an EPDM cleaner or mild detergent with water. Scrub the surface with a soft-bristle brush. Avoid harsh solvents, which can dissolve the rubber. If you use a pressure washer, keep it on the lowest setting and avoid spraying directly at seams.
Rinse thoroughly and let the roof dry completely. This can take a few hours in full sun, or overnight if it is humid.
Step 3: Repair Seams and Flashing
Now that the roof is clean, tackle the weak spots you found in Step 1. For loose seams, apply lap sealant with a caulk gun and press the membrane down firmly. For small punctures or gaps, butyl tape or EPDM repair tape works wonders.
This is the core of any EPDM seam repair. If you have larger damaged areas, use a rubber patch kit. Follow the manufacturer’s instructions and let everything cure before moving to the next step. Rushing this part is how leaks come back.
Step 4: Apply EPDM Primer
Primer is the bridge between the old rubber and the new coating. Without it, your coating may peel off within months. Apply a thin, even coat of EPDM primer to the entire roof using a paint roller.
Focus on seams, repairs, and any shiny or chalky areas. The primer should feel tacky to the touch before you apply the coating usually 30 minutes to 2 hours, depending on temperature and humidity.
Step 5: Apply EPDM Coating or Liquid Rubber
This is where the transformation happens. You can use a liquid EPDM product or a high-quality acrylic elastomeric coating. Liquid EPDM is often the best choice because it is chemically similar to the original membrane.
Pour a ribbon of coating onto the roof and spread it with a roller or squeegee. Work in small sections so the edges do not dry before you blend them. Apply at least two thin coats, letting each coat dry completely in between. Two thin coats beat one thick coat every time.
Step 6: Seal Penetrations and Edges
Pipes, vents, skylights, and roof edges are notorious leak points. After the main EPDM coating is applied, go back and brush on extra coating around these areas. You can also use lap sealant for a thick, flexible bead.
Do not be stingy here. A little extra product now can prevent a big headache later.
Step 7: Final Inspection and Cure Time
Once everything is coated, do a slow walk-around. Look for thin spots, missed areas, or puddles of coating. Fix them while the surface is still workable.
Then, let the roof cure. Most coatings need 24 to 48 hours of dry weather to fully set. Avoid foot traffic during that time. If rain is in the forecast, wait for a clear window before starting.
Common Mistakes to Avoid
I have seen these mistakes ruin otherwise good restorations:
-
Skipping the primer: Coating peels off.
-
Applying coating to a wet roof: Bubbles and poor adhesion.
-
Using harsh cleaners: They can dissolve the rubber.
-
Ignoring seams: Leaks continue under the new coating.
-
One thick coat: It cracks and cures unevenly.
Conclusion
Restoring an EPDM roof is one of the most satisfying DIY projects you can tackle. It saves money, stops leaks, and gives your roof a fresh start. The key is patience: clean properly, repair the seams, use primer, and apply thin, even coats.
If you follow the steps in this guide, you will be standing on a roof that looks almost new and you will have the confidence of knowing you did it yourself. So grab your roller, wait for a dry weekend, and restore your EPDM roof the right way.